
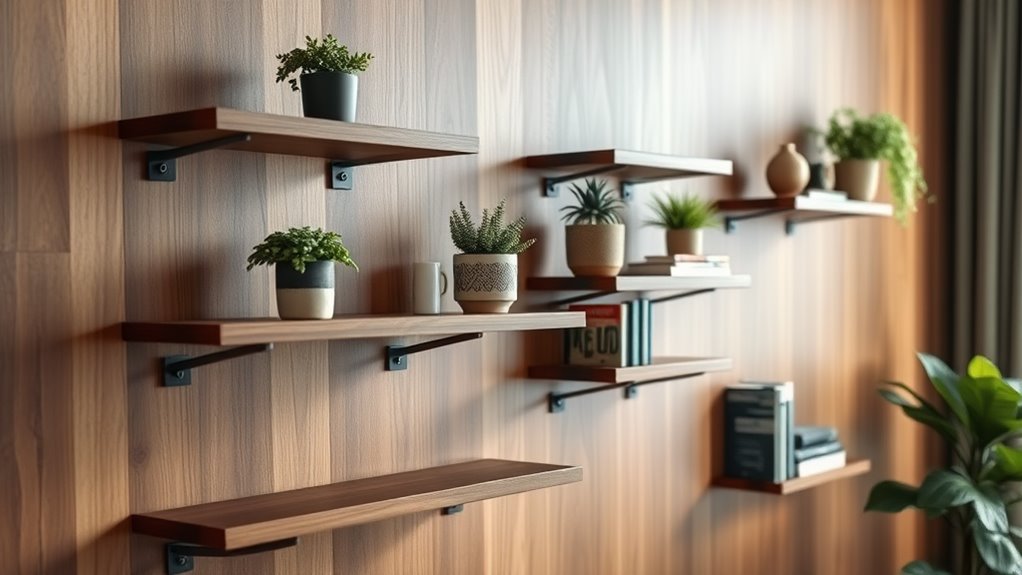
How to Install Floating Shelves for Maximum Style
To install floating shelves for maximum style, start by choosing a location that improves your decor. Measure carefully and mark spots on the wall before installing brackets, ensuring they align with wall studs for support. Select shelves that match your room's aesthetic, considering materials like wood or metal. Once brackets are securely mounted, attach the shelves and check that they're level. For styling, mix heights and textures in decorative items to create visual interest. Don't forget to maintain them regularly. If you're curious about specific tools and techniques, there's plenty more to explore!
Choosing the Right Location
Choosing the right location for your floating shelves is crucial for both functionality and aesthetics. When you think about shelf placement, consider how it complements your existing decor as you serve a practical purpose. You want your shelves to improve the space, not clutter it. Start by evaluating your walls—look for areas that could use a touch of style or additional storage. A well-placed shelf can become a focal point, showcasing your favorite books, plants, or decorative items.
Next, pay attention to wall considerations. Confirm the wall you choose can handle the weight of what you plan to display. If you're going for a modern, minimalist look, think about placing shelves at varying heights. This adds visual interest and allows for creative arrangements. Don't forget about functionality; placing your shelves within easy reach will make it convenient for you to grab items or change displays regularly.
Also, consider the room's lighting. Natural light can highlight your shelves and their contents, making them stand out even more. If your shelves will be in a darker area, think about incorporating some accent lighting to make them pop.
Finally, don't shy away from experimenting. Use painter's tape to outline where your shelves will go; this helps you visualize the space and make adjustments before you commit. With thoughtful shelf placement and careful wall considerations, you'll create an innovative and stylish solution that transforms your space.
Selecting Your Floating Shelves
When selecting your floating shelves, consider the materials available to guarantee they fit your needs. You'll likewise want to think about the size and dimensions that will best suit your space. Finally, don't overlook the style and aesthetics, as these shelves can improve your room's overall look.
Material Options Available
A variety of material options are available for your floating shelves, each offering unique benefits and aesthetics. Choosing the right material can improve your space while ensuring durability and style. Here are some popular choices to reflect on:
- Wood options: Classic and versatile, wood brings warmth and character to any room. You can select from a range of finishes to suit your decor.
- Metal options: For a sleek, industrial look, metal shelves are perfect. They often have higher weight capacities and can support heavier items.
- Composite materials: These can mimic the appearance of wood or metal as they are lightweight and durable, making them an innovative choice for modern spaces.
- Glass shelves: Offering a minimalist aesthetic, glass shelves visually expand your space. They're great for showcasing decorative items but require careful evaluation of weight capacity.
When selecting your floating shelves, reflect on decorative finishes that complement your design theme. Each material option has its own strengths, so contemplate your functional needs and aesthetic preferences. With the right choice, your floating shelves will not just be practical but also a statement piece in your home.
Size and Dimensions
Selecting the right size and dimensions for your floating shelves is vital to achieving both functionality and aesthetic appeal in your space. Start by determining the shelf depth; most floating shelves range from 10 to 12 inches, but you can go deeper for larger items. A deeper shelf can create a more dramatic look, providing ample space for decorative objects or books.
Next, consider the weight capacity. Different materials and mounting systems can support varying amounts of weight, so it's important to choose shelves that can hold your intended items without sagging. A general rule of thumb is to make certain your shelves can bear at least 15-20 pounds per linear foot, but this can vary based on your design choices.
Also, think about the overall dimensions. Confirm your shelves fit proportionately within your wall space and complement your existing furniture. If you're showcasing smaller items, narrower shelves can create a sleek, minimalist vibe. Conversely, if you're displaying larger pieces, opt for wider shelves to guarantee stability and visual impact. Balancing these considerations will help you create a striking, functional display.
Style and Aesthetics
Visual harmony plays a crucial role in the overall impact of your floating shelves. When selecting shelves, you want to create a space that's not just functional but also visually striking. Aim for aesthetic balance by considering the materials, shapes, and colors of your shelves. This will improve your room's design and make a statement.
Here are some tips to guide your selection:
- Material Matters: Choose from wood, metal, or glass to match your decor style.
- Shape and Size: Opt for varying shapes and sizes to create visual intrigue while maintaining balance.
- Color Coordination: Select shelf colors that complement or contrast with your wall and decor, creating a cohesive look.
- Accessorize Wisely: Curate items on your shelves that reflect your personality while maintaining that balance.
Gathering Necessary Tools
Before you start installing floating shelves, gathering the right tools is vital for a smooth process. You want to make certain you have everything at your fingertips, so you can focus on transforming your space. First, identify the shelf materials you'll be working with. Whether you've chosen sleek wood, metal, or glass, different materials require specific tools. For wooden shelves, a drilling machine and a level are fundamental to guarantee precision in installation.
Next, consider the installation types. Are you opting for brackets, cleats, or hidden mounts? Each type has unique requirements. If you're going for a hidden mount, you'll need a stud finder to locate wall studs, which provides the best support for your shelves. For brackets, make certain you have appropriate screws and wall anchors ready.
Don't forget about a measuring tape and a pencil, as they'll help you determine the perfect heights and spacing for your floating shelves. A level is non-negotiable; it assures that your shelves will sit perfectly straight, adding to that polished look you're after.
Lastly, grab a safety mask and goggles, especially if you're drilling into walls. This isn't just about aesthetics; it's about safety, too. With the right tools, you're primed for success. So, gather these fundamentals, and you'll be well on your way to creating a stylish display that combines functionality with flair.
Measuring and Marking
To get your floating shelves perfectly placed, you'll need a few measuring tools like a tape measure and a level. Start by determining the ideal height for your shelves before marking the locations of the wall studs. Accurate measurements and clear markings will guarantee a sturdy and visually appealing installation.
Tools Needed for Measuring
Accurate measuring is vital for installing floating shelves, and having the right tools can make all the difference. To guarantee your shelves are perfectly aligned and positioned, gather these vital measuring tools:
- Measuring tape: A flexible measuring tape is critical for determining the exact length and height you need.
- Level tool: This helps you achieve that straight, professional look by checking if your shelves are perfectly horizontal.
- Pencil: A fine-tip pencil allows you to make precise marks on your wall without leaving permanent damage.
- Square: A carpenter's square is helpful for confirming your markings are at right angles, especially if you're working in a corner space.
With these tools in hand, you'll be well-prepared to take accurate measurements. Start by measuring the wall space where the shelves will go, marking those measurements lightly with a pencil. Then, use the level tool to verify that your marks are even. This initial setup is vital for a successful installation, allowing your floating shelves to not just look stunning but additionally remain functional and secure. Embracing these tools will raise your shelving project to new heights!
Determining Shelf Height
With your measuring tools ready, the next step involves determining the height for your floating shelves. Think about the purpose of the shelves and how they'll fit into your room's proportions. You want to improve the space without overwhelming it. A good rule of thumb is to position the bottom shelf around eye level, which is typically between 54 and 60 inches from the floor. This height allows for easy access while creating a balanced aesthetic.
Consider the items you plan to display. If you're showcasing books or decor, confirm the shelf height accommodates these items comfortably. Measure the height of your tallest items, then add a bit of breathing room above them to avoid a cramped look.
Don't forget to factor in the overall room proportions; tall ceilings might benefit from higher shelf placements to draw the eye upward. Conversely, in cozier spaces, lower shelves can create intimacy.
Lastly, visualize the arrangement. Standing back and evaluating how the shelves interact with your existing decor can help finalize your shelf height decision. Aim for harmony, and you'll create a stunning focal point that raises your room's style.
Marking Wall Studs
Before you start drilling into your walls, it's crucial to locate and mark the wall studs. Finding these sturdy supports guarantees your floating shelves won't sag or come crashing down. A stud finder makes this task a breeze; just run it along the wall until it signals the location of the studs. Once you've identified them, mark their positions lightly with a pencil.
Here are some tips to keep in mind:
- Use a level: This helps confirm your markings are straight and true.
- Measure carefully: Double-check the distance between studs, typically 16 or 24 inches apart.
- Consider wall anchors: If you can't hit a stud, use wall anchors for added support when installing your shelves.
- Plan your layout: Visualize your shelves and their contents to verify they'll fit well within the space.
Installing Brackets Properly
Properly installing brackets is crucial for guaranteeing your floating shelves are secure and functional. First, choose the right bracket types for your project. There are several options available, from concealed brackets that maintain a sleek look to heavy-duty brackets designed for added support. Consider the weight and size of the shelves and items you'll display when selecting your brackets.
Next, gather your tools: a level, drill, screwdriver, and measuring tape. Start by marking the desired height for your shelves on the wall, confirming that your measurements are consistent for both brackets. When positioning the brackets, align them with the marked wall studs for maximum strength. If you're using concealed brackets, be sure to follow the manufacturer's guidelines for drilling and securing the brackets into the wall.
As you install, utilize installation tips such as pre-drilling holes to prevent the wood from splitting and checking for level after each bracket is secured. This attention to detail guarantees that your shelves will not only be functional but additionally aesthetically pleasing. If you're working with uneven walls, consider using shims to verify that your brackets sit flush against the surface.
Once you've installed the brackets, double-check their alignment and sturdiness before proceeding to attach the shelves. With the right bracket types and thoughtful installation tips, you're set to create a stylish and reliable floating shelf display that improves your space.
Attaching the Shelves
Once the brackets are securely in place, it's time to attach the shelves. This step is essential for achieving both function and style in your space. Use innovative shelf alignment techniques to guarantee your shelves are perfectly positioned. Start by placing the shelf on the brackets and check that it fits snugly. If you've chosen adjustable brackets, take advantage of that flexibility to find the ideal height.
While securing the shelves, keep these tips in mind:
- Double-check measurements: Verify the shelf is level before fully securing it.
- Use a level tool: A small level will help you maintain that sleek, straight look.
- Secure the shelf brackets: Make sure to fasten the shelves tightly to avoid any wobbles.
- Test the weight capacity: Gradually add weight to confirm everything holds up as expected.
When you secure your shelf properly, you not only improve its aesthetic appeal but also its functionality. Once everything's aligned and fastened, take a step back and admire your handiwork. You've transformed your space with floating shelves that are both stylish and practical. Remember, the right techniques in attaching your shelves can make all the difference in achieving that innovative, contemporary look you desire. So, go ahead and make your floating shelves a standout feature in your home!
Styling Your Floating Shelves
Styling your floating shelves can improve your space and showcase your personality. With a little creativity, you can turn these shelves into a stunning focal point. Start by considering your shelf arrangement. Think about the height and depth of each shelf, in addition to the overall balance. You want to create visual interest, so mix and match different heights and sizes of decorative items.
Incorporate a variety of textures and materials to keep things intriguing. Combine wooden accents, metal elements, and glass objects. For instance, a sleek glass vase can contrast beautifully with a rustic wooden box. You might likewise want to add some greenery; plants breathe life into your shelves and add a pop of color.
When choosing decorative items, think about displaying cherished mementos, unique finds, or even art pieces. Group similar items together for a cohesive look, but remember to leave some space empty for breathing room. This allows each piece to stand out without overwhelming the eye.
To make your shelves feel curated, consider a theme or color palette. Whether you prefer a minimalist aesthetic or a bohemian vibe, consistency can tie your shelf arrangement together. Finally, don't hesitate to change things up! Refresh your shelves with the seasons or as your style evolves. By experimenting with different decorative items and arrangements, you'll create a dynamic display that reflects who you are and transforms your space.
Maintenance Tips
Keeping your floating shelves looking their best requires regular maintenance to prevent dust buildup and guarantee your decorative items remain in top shape. With the right cleaning techniques, you can improve both the aesthetic appeal and shelf durability of your installations. Here are some simple yet effective maintenance tips you can follow:
- Dust Regularly: Use a microfiber cloth to wipe down your shelves weekly. This prevents dust accumulation and keeps your decorative pieces shining.
- Avoid Harsh Chemicals: Stick to mild cleaners or a damp cloth when cleaning. Harsh chemicals can damage the finish and compromise shelf durability.
- Check for Stability: Periodically inspect the brackets and wall mounts to verify everything remains secure. Tighten screws or replace any worn-out parts quickly to maintain the structural integrity of your shelves.
- Rotate Decorative Items: Changing up your decor not just keeps your space dynamic but additionally allows you to clean behind and beneath items that may otherwise be overlooked.
Common Mistakes to Avoid
When installing floating shelves, it's easy to overlook some critical details that can lead to problems down the line. One common installation error is not using the right wall anchors. If you're attaching shelves to drywall without proper anchors, they might not support the weight, resulting in a disappointing crash. Always verify you're using heavy-duty anchors that suit the weight capacity of your shelves.
Another design pitfall is neglecting to plan your layout. Before you start drilling, visualize how the shelves will look in your space. Measure the distance between them carefully; cluttered or haphazardly spaced shelves can throw off your room's aesthetic. Use painter's tape to mark the proposed positions on the wall to see how they'll fit.
Additionally, don't underestimate the importance of level. Installation errors often occur when shelves are installed at an angle. Use a level tool during the installation process to confirm that each shelf is perfectly horizontal—this simple step can make a massive difference in the overall look.
Finally, consider the weight distribution. Placing too many heavy items on one side can lead to tilting or, worse, a collapse. Spread the weight evenly across the shelves and avoid overloading them.
Frequently Asked Questions
What Types of Materials Are Best for Floating Shelves?
When choosing materials for floating shelves, you'll want to contemplate both wood options and metal finishes. Solid woods like oak or walnut offer a classic, warm feel, whereas engineered woods can be more budget-friendly and versatile. If you're aiming for a modern look, sleek metal finishes like brushed nickel or matte black can enhance your space. Mixing these materials can additionally create an innovative, layered effect that stands out in any room.
Can I Install Floating Shelves in Rental Spaces?
Can you really make floating shelves work in a rental? Absolutely! Although rental restrictions might limit your options, you can still find innovative, temporary solutions. Consider using adhesive strips or brackets that won't damage walls, allowing you to install stylish shelves without permanent alterations. Plus, you can easily remove them when it's time to move. With a little creativity, you can improve your space while respecting your landlord's rules.
How Much Weight Can Floating Shelves Typically Hold?
Floating shelves typically hold between 10 to 50 pounds, depending on their design and installation. To guarantee shelf stability, choose brackets or anchors that match your shelf's weight capacity and the wall type. If you're aiming for innovation, consider using advanced mounting systems that distribute weight evenly. This way, you can confidently display your favorite books or decor without worry. Just remember, always check manufacturer recommendations to avoid any mishaps!
Do I Need a Stud Finder for Installation?
Envision floating your treasures on sleek shelves, only to have them crash down. Using a stud finder can prevent that heart-stopping moment. It helps you locate sturdy support within your walls, ensuring a secure installation. During there are alternatives, like wall anchors, they might not offer the same peace of mind. Embracing a stud finder's benefits means you're choosing innovation for a stylish, worry-free display in your space.
Are There Any Specific Wall Types to Avoid for Installation?
When considering wall material for your floating shelves, avoid drywall with significant damage or plaster with unknown integrity. Installation surface types like concrete or brick are sturdy, but they require specialized anchors. If you're working with drywall, confirm it's in good condition and ideally anchored to studs. Always assess wall material considerations to guarantee your shelves not just look stylish but furthermore hold up against everyday use. Choose wisely for lasting innovation!


